

Stage Laser Light Setup: Mount, Wire & Run It Safely
Stage Laser Light Setup: Mount, Wire & Run It Safely
Renting a stage laser setup for a single event often looks impressive during the show. The challenge begins after the production crew leaves, when venue staff must manage, mount, and control the rig themselves.
While many guides describe laser light physics, few explain how to construct a safe, professional stage rig. This guide breaks down the how to do it, from hardware selection to creating atmospheric haze.
Match the laser output to venue dimensions
Selecting a stage laser light requires matching diode output to venue size and ambient lighting. An underpowered projector looks washed out on an outdoor festival stage, while an oversized unit will look too strong in a small space.
For small venues, DJ booths, and private event spaces, compact units provide sufficient output without requiring heavy power drops. The LaserCube 1.2W WiFi delivers 190 lumens, while the LaserCube 2.5W WiFi produces 470 lumens with enhanced white balance for mid-sized club environments.
For festival stages and venues accommodating up to 1,000 guests, the flagship LaserCube 10W Ultra MK2 generates 1,405 lumens to cut through bright stage washes. This Class 4 projector includes native DMX, Art-Net, MIDI, and ILDA connectivity for large-scale stage integration.
- LaserCube 1.2W WiFi: 1,200mW output (190 lumens), engineered for small rooms, DJ booths, and intimate indoor spaces.
- LaserCube 2.5W WiFi: 2,500mW output (470 lumens), built for mid-sized clubs and lounge venues needing brighter color mixing.
- LaserCube 10W Ultra MK2: 10,000mW output (1,405 lumens) with high-speed galvos, designed for festival stages and touring rigs.
Secure hardware mounting before running data lines
Mechanical mounting must always precede cable routing, because a shifting laser projector creates immediate safety hazards. Securing the chassis first prevents accidental misalignment and protects overhead stage gear during installation.
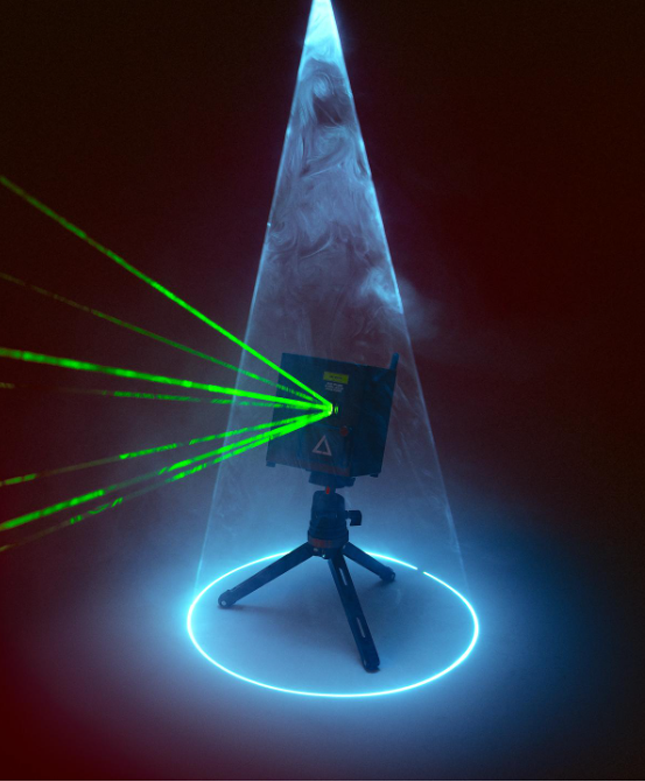
Compact WiFi projectors mount directly onto tripods equipped with a quick-release ball head plate. In contrast, the LaserCube 10W Ultra MK2 features a built-in truss bracket designed for an M8 bolt, fitting standard stage lighting clamps.
Operators should always attach a secondary safety bond through the rear eye bolt to keep the 8.2 lb (3.7 kg) chassis secure if a clamp fails. The Ultra MK2 chassis measures 155 x 150 x 155mm, making it simple to fit into compact lighting grids.
Wire control signals and power connections
Integrating a laser into a stage production follows the same protocol as moving head fixtures or fog machines. The Ultra MK2 features native DMX in and out ports, enabling lighting technicians to assign starting universe addresses quickly.
Technicians select channel profiles based on the required control depth during live performances:
- 4-channel profile: Controls page selection, cue switching, and playback speed.
- 8-channel profile: Adds live X/Y axis scaling and position offsets.
- 16-channel profile: Provides full control over power, X/Y scale, offset, rotation, mirroring, cue selection, speed, and recoloring.
Connecting an ethernet switch to the LAN port routes Art-Net signals across multi-universe stage setups. Internal batteries power both WiFi models and the Ultra MK2, with the Ultra MK2 delivering 3 to 4 hours of continuous runtime on a single charge.
Further technical details on control protocols are available in this guide on what a DMX laser is.
Establish physical interlocks and digital safety zones
Public laser displays require two distinct safety layers: a physical kill switch and digital blackout boundaries. High-output Class 4 projectors demand strict operational protocols to protect audience eyes, camera sensors, and stage equipment.
The Ultra MK2 emergency stop (E-Stop) system uses standard RJ45 ethernet cables, enabling technicians to daisy-chain up to eight units from a single control pendant. WiFi models and original Ultra MK1 units utilize GX12 aviation connectors, which are not interchangeable with MK2 hardware.
Arming the hardware requires a specific physical sequence:
- Turn the safety keys on both the E-Stop pendant and the laser chassis to the green position.
- Verify that the red E-Stop kill button is popped up and disengaged.
- Press and hold the green arming button for one second until the white LED indicators blink rapidly.
Digital safety tools inside LaserOS allow operators to draw custom blackout boundaries over sensitive areas. Setting an attenuation zone and clicking Invert creates a red blackout box that drops laser power to zero percent inside that region.
Commercial public shows in the United States require a filed FDA variance, which operators submit independently for legal event compliance. The International Laser Display Association publishes safety standards referenced by event regulators worldwide.
Select software workflows for live show control
Choosing control software depends on whether the laser operates independently or connects to a master lighting console. Selecting the right interface ensures smooth visual transitions throughout a performance.
The free LaserOS platform includes 75+ music-reactive visualizers, BPM detection, and Ableton Link support. Operators can run automated shows from a tablet or laptop without needing extensive programming experience.
For complex stage productions, the onboard CubeOS menu on the Ultra MK2 links to USB MIDI controllers, such as the APC40 MK II or APC Mini MK II. This hardware integration allows live control over strobes, color shifts, and zoom effects, while pre-rendered shows can run directly from an included 64GB SD card.
Introduce atmospheric haze to reveal aerial beams
Laser beams travel invisibly through clear air, requiring floating micro-particles to scatter the light toward human eyes. Without an atmospheric medium, projected light remains hidden until it strikes a wall or solid surface.
A light, even mist transforms flat 2D shapes into volumetric 3D fans, tunnels, and sweeping aerial sheets. Using a compact unit like the Nano Fogger provides portable atmospheric density without requiring bulky floor hazers.
Placing the haze machine slightly upwind of the laser projector allows natural air currents to distribute mist evenly across the beam path. Additional setup techniques appear in this guide on smoke laser effects.
Wrapping up
Constructing a reliable stage laser rig does not require renting unfamiliar equipment for every performance. Following a structured installation sequence keeps live productions safe, compliant, and visually striking:
- Select appropriate laser output based on venue dimensions and ambient lighting.
- Secure hardware to trusses or tripods with safety cables before attaching data lines.
- Establish signal connections using DMX, Art-Net, or wireless LaserOS protocols.
- Configure physical E-Stop interlocks and set digital safety attenuation zones.
- Choose the software workflow that matches live performance requirements.
- Add atmospheric haze to scatter light and reveal 3D aerial beam structures.
Event producers reviewing hardware for upcoming shows can compare models on the LaserCube lineup page to find the right system.
Frequently Asked Questions (FAQs)
Does a stage laser light need a fog machine to work?
Is a laser safety officer required for a public show?
Can the LaserCube Ultra MK2 be controlled from a lighting console?
What is the main difference between the WiFi series and the Ultra MK2 for stage use?
Can a LaserCube run on battery power during a show?