What Is Laser Mapping? A Projection Mapping Guide
Learn how laser mapping works. Compare vector lasers to video projectors, galvo speeds, 4-step setup, and safety zones with LaserCube
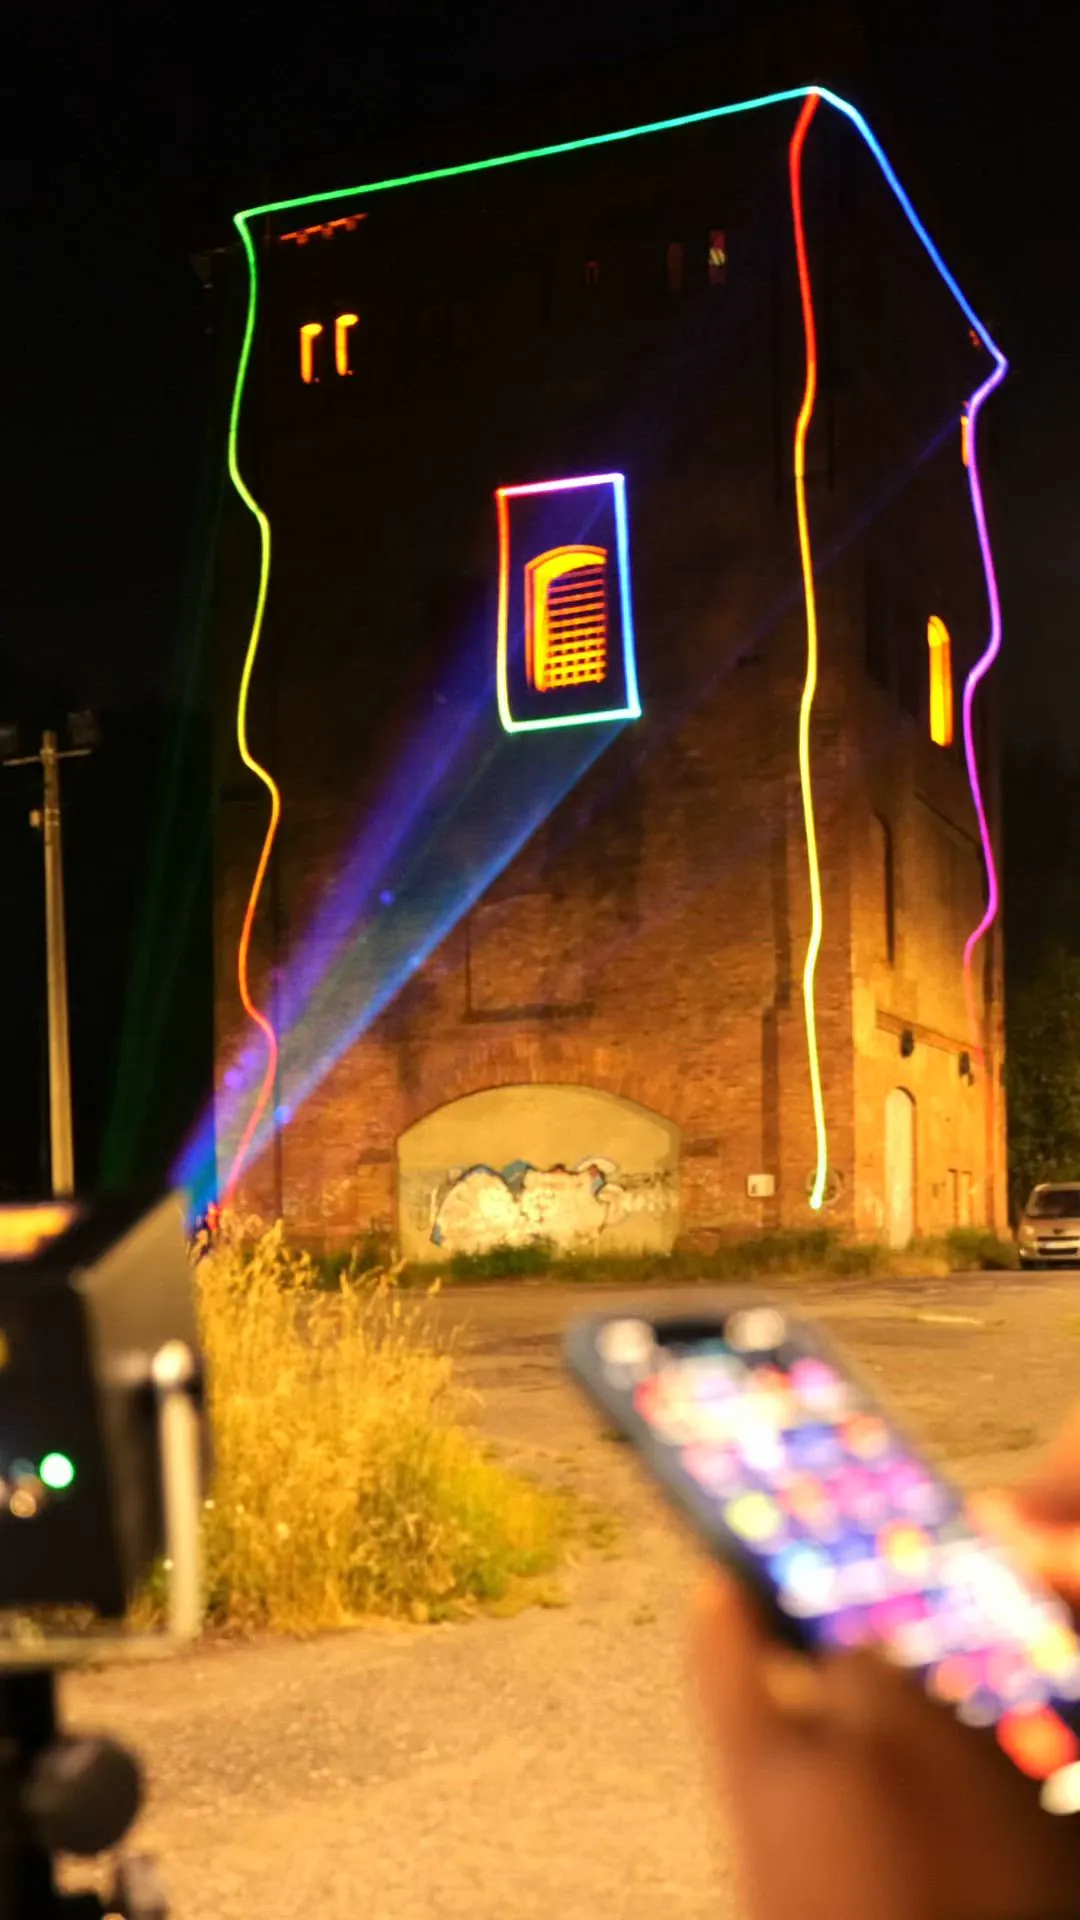
Setting up traditional projection mapping often feels overwhelming for event creators. High-lumen video projectors are heavy, draw massive power, and spill unwanted gray light around physical objects. This constant battle with ambient light and complex software can stall production schedules.
Portable laser mapping offers a clean alternative that delivers sharp, focused vector paths and true zero-light black levels in minutes.
What Is Laser Mapping?
Laser mapping is a visual technique that uses focused vector light beams to outline, trace, and illuminate the physical geometry of 3D objects. Instead of projecting onto a flat white screen, lasers transform physical objects like stage props, sculptures, and building facades into dynamic visual canvases.
Concentrated laser light keeps sharp focus and high contrast over long distances: the beam widens only slowly, though beyond about 400 meters graphics blur unless the surface is huge. Whether outlining a small indoor prop or a multi-story building, the projected vector lines stay crisp across every edge and corner.
This versatility allows visual artists, mobile DJs, and event producers to create high-impact visual displays without installing permanent lighting structures. Learn more about selecting hardware in our guide to 3D laser mapping projectors.
Why Vector Lasers Outperform Video Projectors for Mapping
Traditional video projectors project a fixed grid of rectangular raster pixels. When mapping a complex 3D object, video projectors spill “dark gray” light onto surrounding surfaces because projector lamps cannot output true black.
Vector lasers operate differently by directing a single, concentrated beam only where light is needed. Blank areas receive zero light output, creating absolute contrast against dark backgrounds.
- Projection Style: Video projectors rely on pixel grids (raster), while vector lasers draw continuous, focused lines.
- Black Levels: Video projectors spill dark gray light into unmapped areas, whereas vector lasers produce absolute zero light output.
- Ambient Light Performance: Video projections wash out easily under ambient light, while laser lines keep high contrast in the dark (no LaserCube is suitable for projecting outdoors in daylight).
- Power & Portability: High-lumen video projectors require heavy AC power drops, while compact laser projectors run on built-in battery power.
Compact laser projectors like the battery-powered LaserCube WiFi Series (1.2W and 2.5W) deliver high-visibility outlines without heavy power cables. For larger venues and building projection mapping, high-output systems like the LaserCube 10W Ultra MK2 provide high brightness from a lightweight, portable chassis.
How Galvo Scanners Drive Precision Vector Graphics
Inside every laser mapping system, motorized X and Y axis mirrors called galvanometer scanners (galvos) steer the laser beam thousands of times per second. These rapid mirror movements trick the human eye into seeing solid shapes, logos, and continuous vector lines.
Galvo scanner speed is measured in Kilo Points Per Second (KPPS). Higher KPPS ratings allow galvos to trace denser vector shapes, complex text, and intricate logos without visual flickering.
- LaserCube WiFi Series (1.2W & 2.5W): Uses AT-25K galvo scanners (25,000 pps @ 6°) for indoor props, monograms, and mobile setups.
- LaserCube 10W Ultra MK2: Uses upgraded AT-40S galvo scanners (35,000 pps @ 7°) for complex 3D object tracing, intricate SVG logos, and wide architectural facades.
How to Map Any 3D Surface in 4 Simple Steps
Modern software like LaserOS makes mapping physical objects accessible through a touch-and-draw or point-and-click workflow on a phone, tablet, or laptop.
1. Position and Power the Hardware
Mount the laser projector securely on a tripod, run on built-in battery power, and connect wirelessly via WiFi or through a wired Ethernet LAN switch.
2. Open the LaserOS Draw App or Trace Mode
Launch the free LaserOS app and open the Draw App for freehand tracing, or enable Trace Mode under tools to convert static SVG logos into dynamic drawing effects.
3. Align Vector Lines to Physical Edges
Touch and drag vector nodes directly on your screen to match the real-world corners, prop edges, or architectural details of your target object.
4. Apply Music Sync and Color Effects
Enable music-reactive visualizers, color sweeps, or automated playlists to keep the mapped display moving in sync with audio tracks.
Key Accessories for Short-Throw and Outdoor Mapping
Pairing optical lenses and protective accessories with a laser projector expands mapping coverage and safeguards hardware during live events.
The Expander Lens makes the total projection area nine times larger. This optical accessory triples the scan angle, enabling wide-angle projection mapping from short throw distances in tight venue spaces.
For outdoor architectural displays, the Rain Cover upgrades the chassis weather protection to IP63, for light rain (not heavy rain or snow), while allowing laser beams to project clearly (the LaserCube Pro’s rain cover isn’t available yet).
Mounting hardware on a sturdy tripod with a quick-release plate allows fast positioning on uneven ground without running extension cords across venue floors. Explore complete setups on the LaserCube gear page.
How to Configure Safety Zones
LaserCube is a professional show laser, not a toy: never aim it at people’s eyes, at audiences or at aircraft, and never at anything flammable. Read our safety tips before your first show.
The free LaserOS app includes Attenuation Zones (Safety Zones). Operators draw digital rectangles, circles, or ellipses around the mapped object, so the projection stays inside it, or over camera lenses, video projectors and other objects, to keep the beams off them.
Inside a red (keep-out) zone, or outside a green (keep-within) zone, the laser power is reduced according to the attenuation setting; at 100% attenuation those beams are fully blanked.
A zone never protects people: it works on top of the beam block and the 3 m rule, never instead of them. Keep every beam at least 3 m (10 ft) above the floor wherever people may be, set the beam block so nothing scans into audience areas (it can’t be used with the Expander or another lens fitted), and make sure nobody stands in front of the laser. An E-Stop (required in the US, optional elsewhere), plugged into the cube’s E-Stop port, gives you a big red button to stop the laser at once.
Wrapping Up
Laser mapping replaces heavy video gear with razor-sharp vector light that transforms physical surfaces straight from a phone or laptop. With intuitive mapping tools and battery-powered mobility, creating dynamic visual displays is simple and fast.
Ready to see the full LaserCube lineup? Visit the LaserCube product page to compare models, bundles, and accessories—and find the right setup for your next show.
Frequently Asked Questions (FAQs)
Here are answers to common questions about laser projection mapping.
Q01What surfaces can you project onto?
You can project onto almost any surface. Lighter-colored surfaces usually show the laser light best. People often project onto buildings, stage props, sculptures, screens, walls, and even water screens. The key is matching the projection to the surface shape using software.
Q02What software is needed for laser mapping?
You need software that can communicate with the laser projector and include mapping tools. For the LaserCube, the LaserOS software handles this. It lets you define projection zones, warp or adjust the image to fit surfaces, and control the content being displayed. Other professional laser control software also exists with similar functions.
Q03Is laser projection mapping hard to set up?
It used to be quite complex, but tools like LaserOS and devices like LaserCube have made it much easier. The basic steps involve setting up the projector, connecting to the software, and using the software's tools to align the projection with your target object. While complex projects take time, simple mapping is quick.
Q04How is this different from video projection mapping?
Video projectors project pixels to create filled-in images, like a TV screen but shaped to an object. Laser projectors draw lines and shapes with a focused beam of light. Lasers often look brighter, sharper, and can create "outline" or "wireframe" effects that are difficult for video projectors. They work differently and create distinct visual styles.
Q05What is projection mapping in simple terms?
Projection mapping is a technique that projects light or graphics onto three-dimensional objects like buildings or stage props. By aligning the projected visual paths with real-world edges, flat light turns physical structures into dynamic displays.
Q06Can lasers project full-color video files or photographs?
No. Video projectors shine static raster pixel grids suitable for full-frame video playback and photographs. Laser show projectors use motorized galvo mirrors to draw continuous vector paths, requiring stroke-only line artwork (0% fill opacity) like SVG vector files, though they can animate line-art outlines.
Q07Do you need fog or haze for surface projection mapping?
No fog or haze is required when projecting graphics, text, or outlines directly onto solid physical surfaces. Airborne haze is only necessary if an operator wants to reveal physical 3D light beams floating in mid-air between the projector and the wall.
See it for yourself
LaserCube is a portable, battery-powered RGB laser projector, and its show software, LaserOS, is free.
Explore the LaserCube lineup